DIY Country Kitchen
I’ve been MIA from the blog! 4 little ones and DIY home renovation projects do not go well together. However, I’m SUPER proud of the little space we created in our first home. Here are some pictures documenting the process of our kitchen project.
This project was definitely thrifty and full of creativity between my Dad and I. People, don’t sleep on OfferUp and Thrift Stores!!
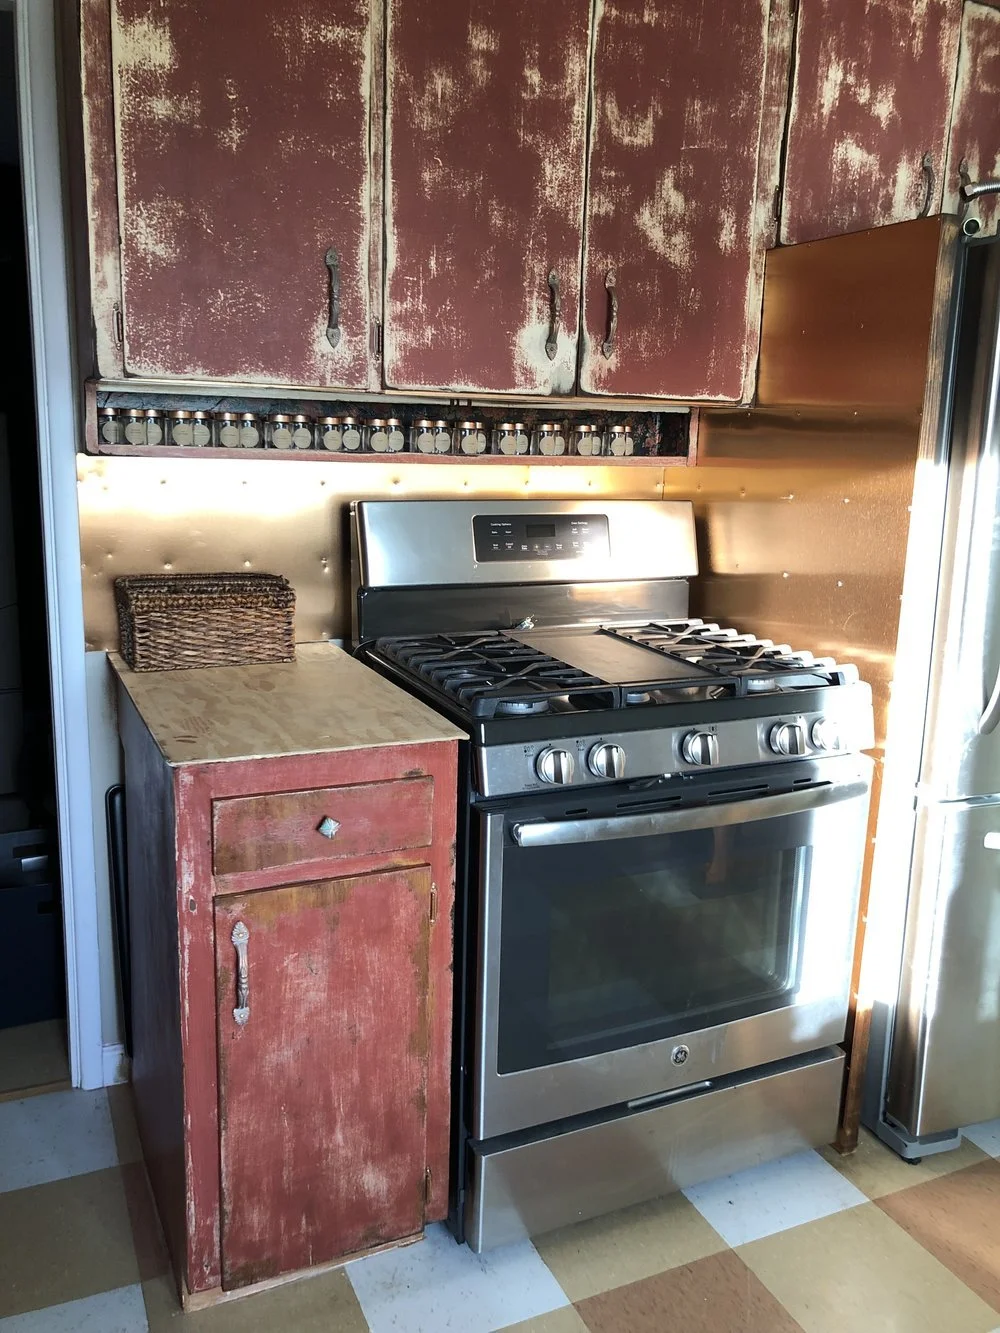
I found the cabinet next to the stove for $15 at my local Habitat for Humanity (favor ain’t fair). It had the hardware to match the original cabinets in the house and everything. We decided to add the butcher block and a pull out trash can system inside. It's made a perfect work station for meal prep.
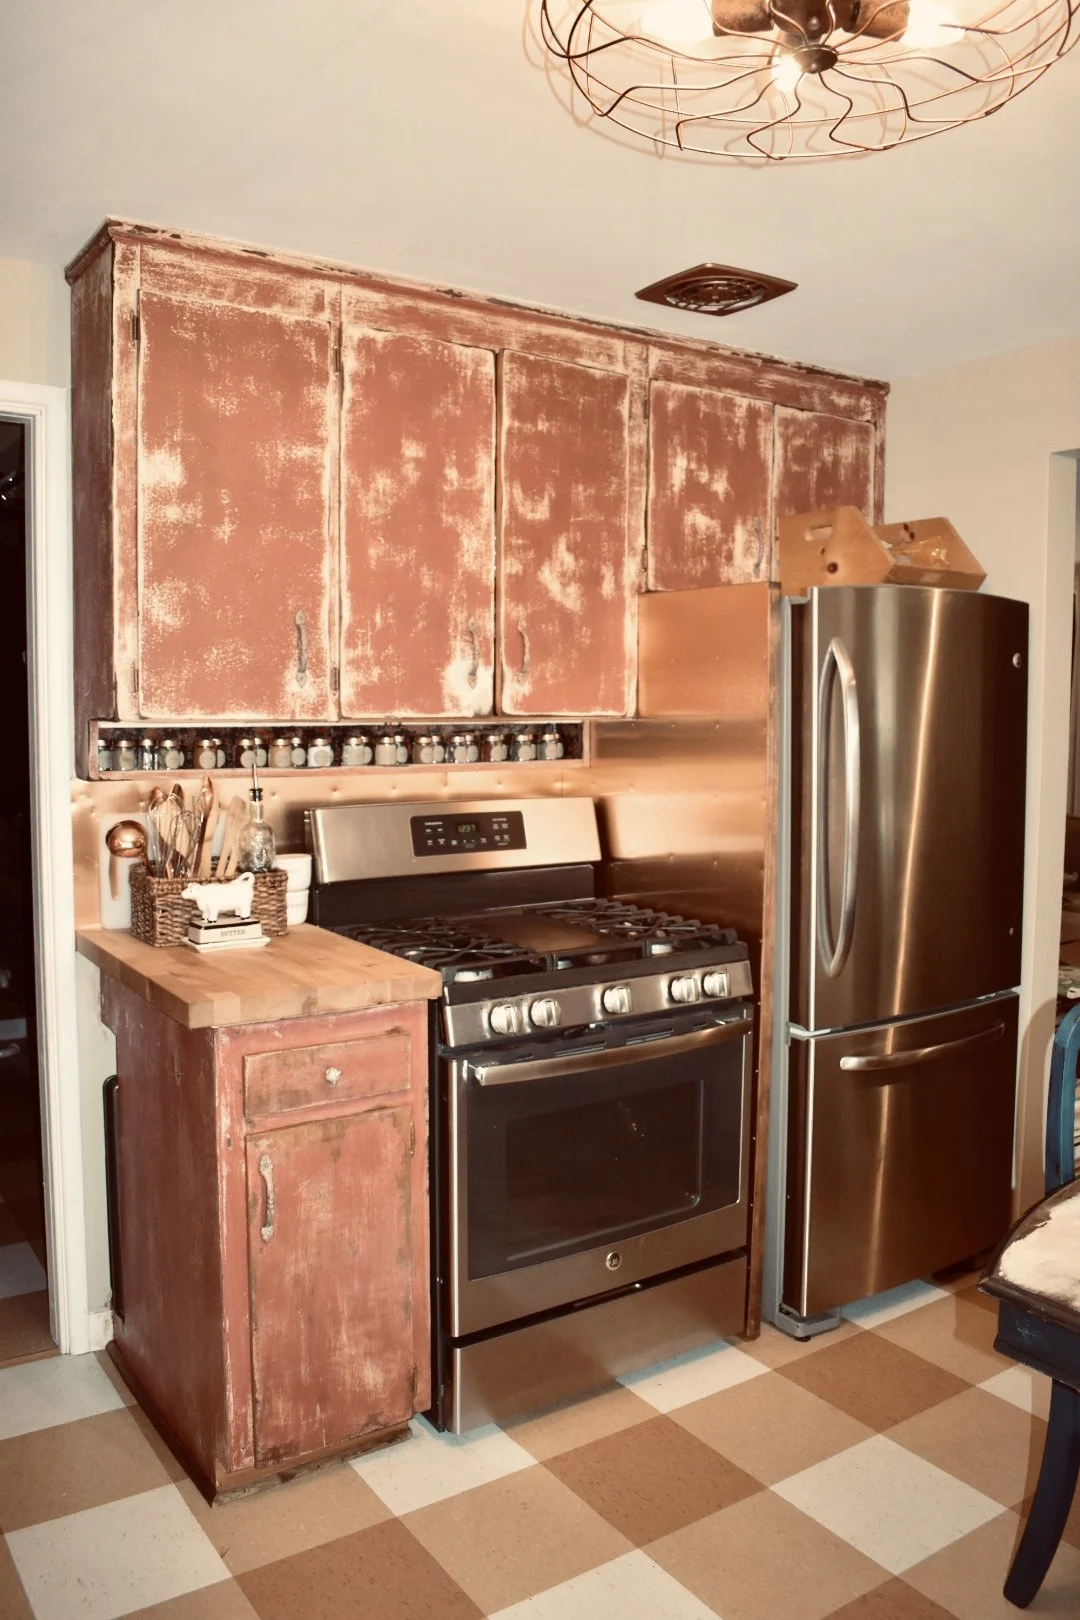
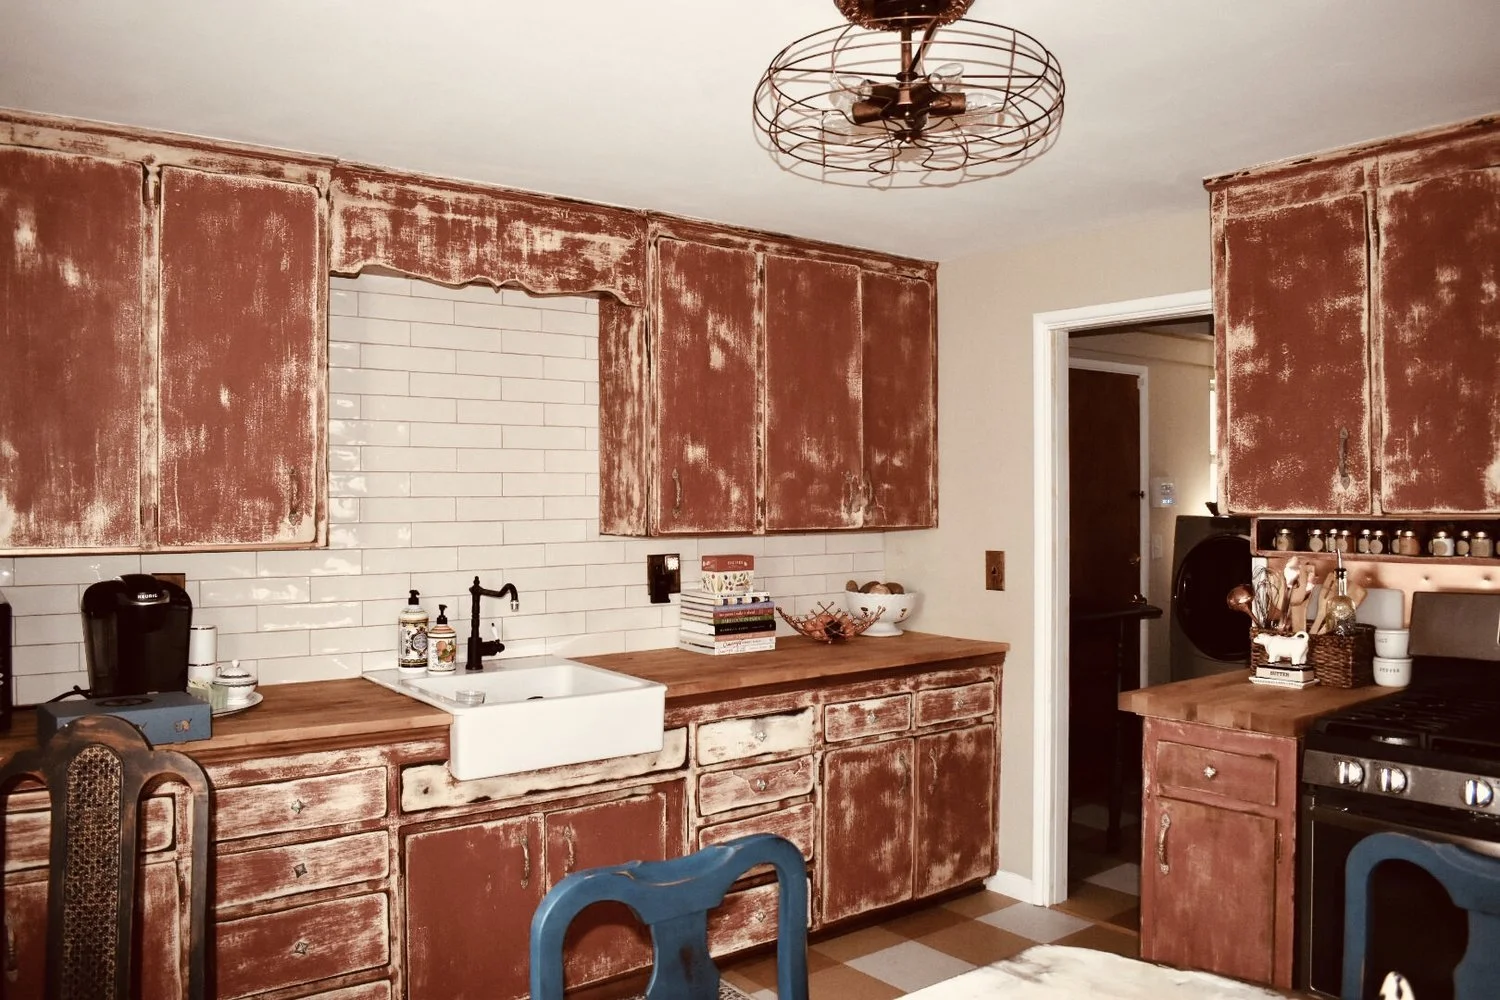
We added in the wall between the stove and refrigerator; my Dad came up with the idea to finish the area with the sheets of copper. It added such a cool pop to this space.
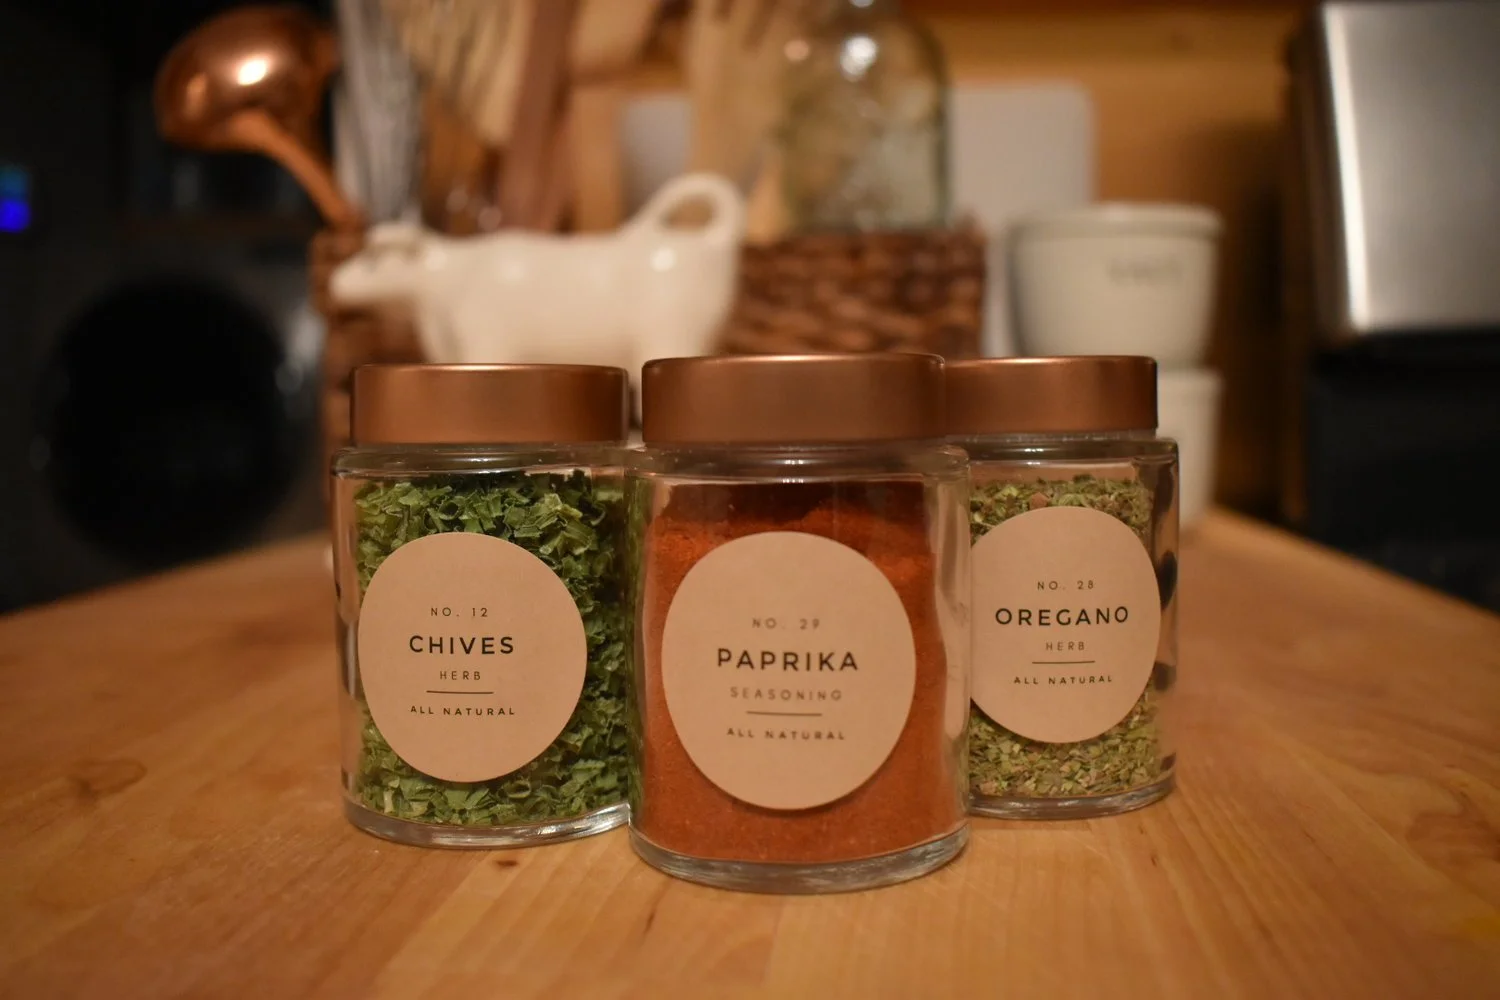
I was pumped about the old school built in spice rack on our cabinets. I found these perfect spice jars at Target for $1.49 and these labels on Etsy from Paper & Pear.
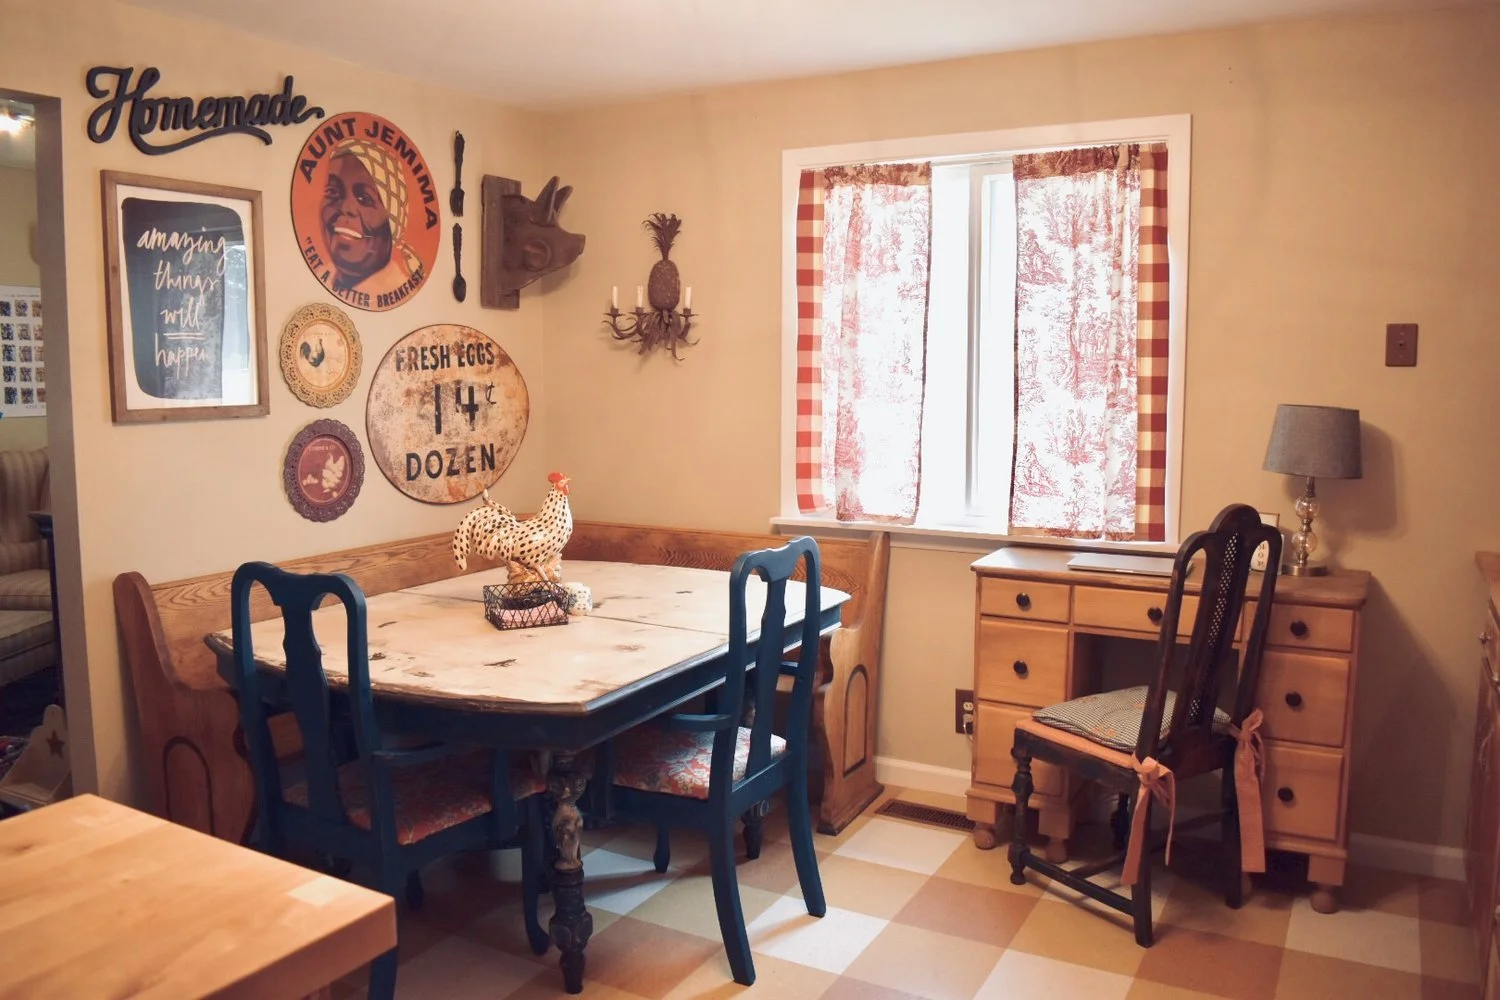
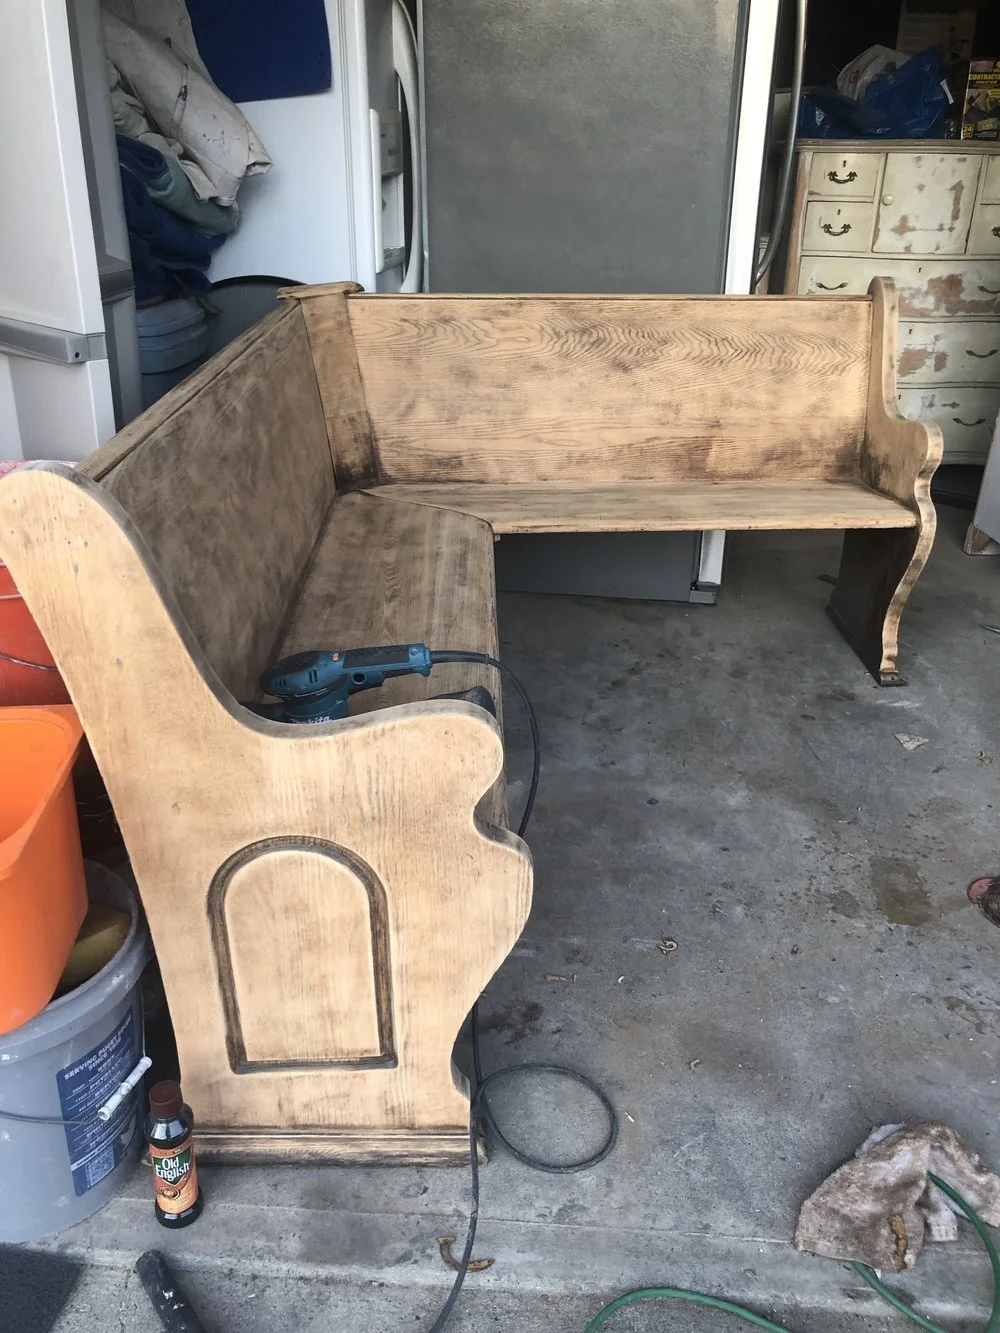
This little nook will probably never be complete. I plan to junk up the walls with vintage china and other funky pieces. I’m most in love with the pew. This was also a Habitat for Humanity find, only $40!! My Dad and his buddy got creative and made it a perfect fit for the space. I spent an ungodly amount of time sanding it down, but it was worth it. My little desk area was a Goodwill find for $14 bucks, that we also refinished. My Dad refinished the desk chair that he found on the side of the road awhile ago and had it sitting in storage.

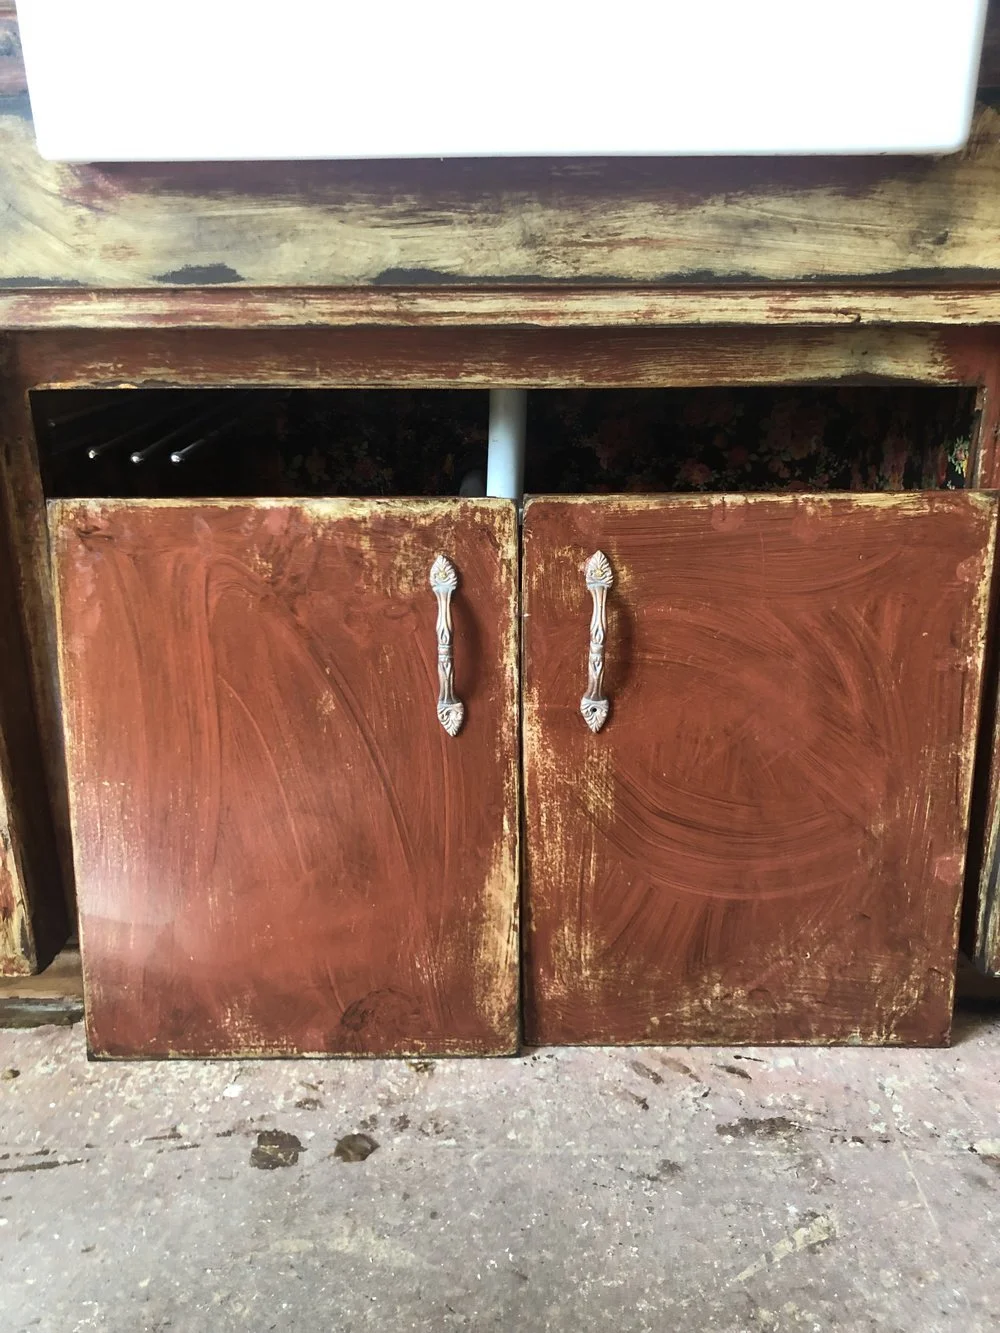
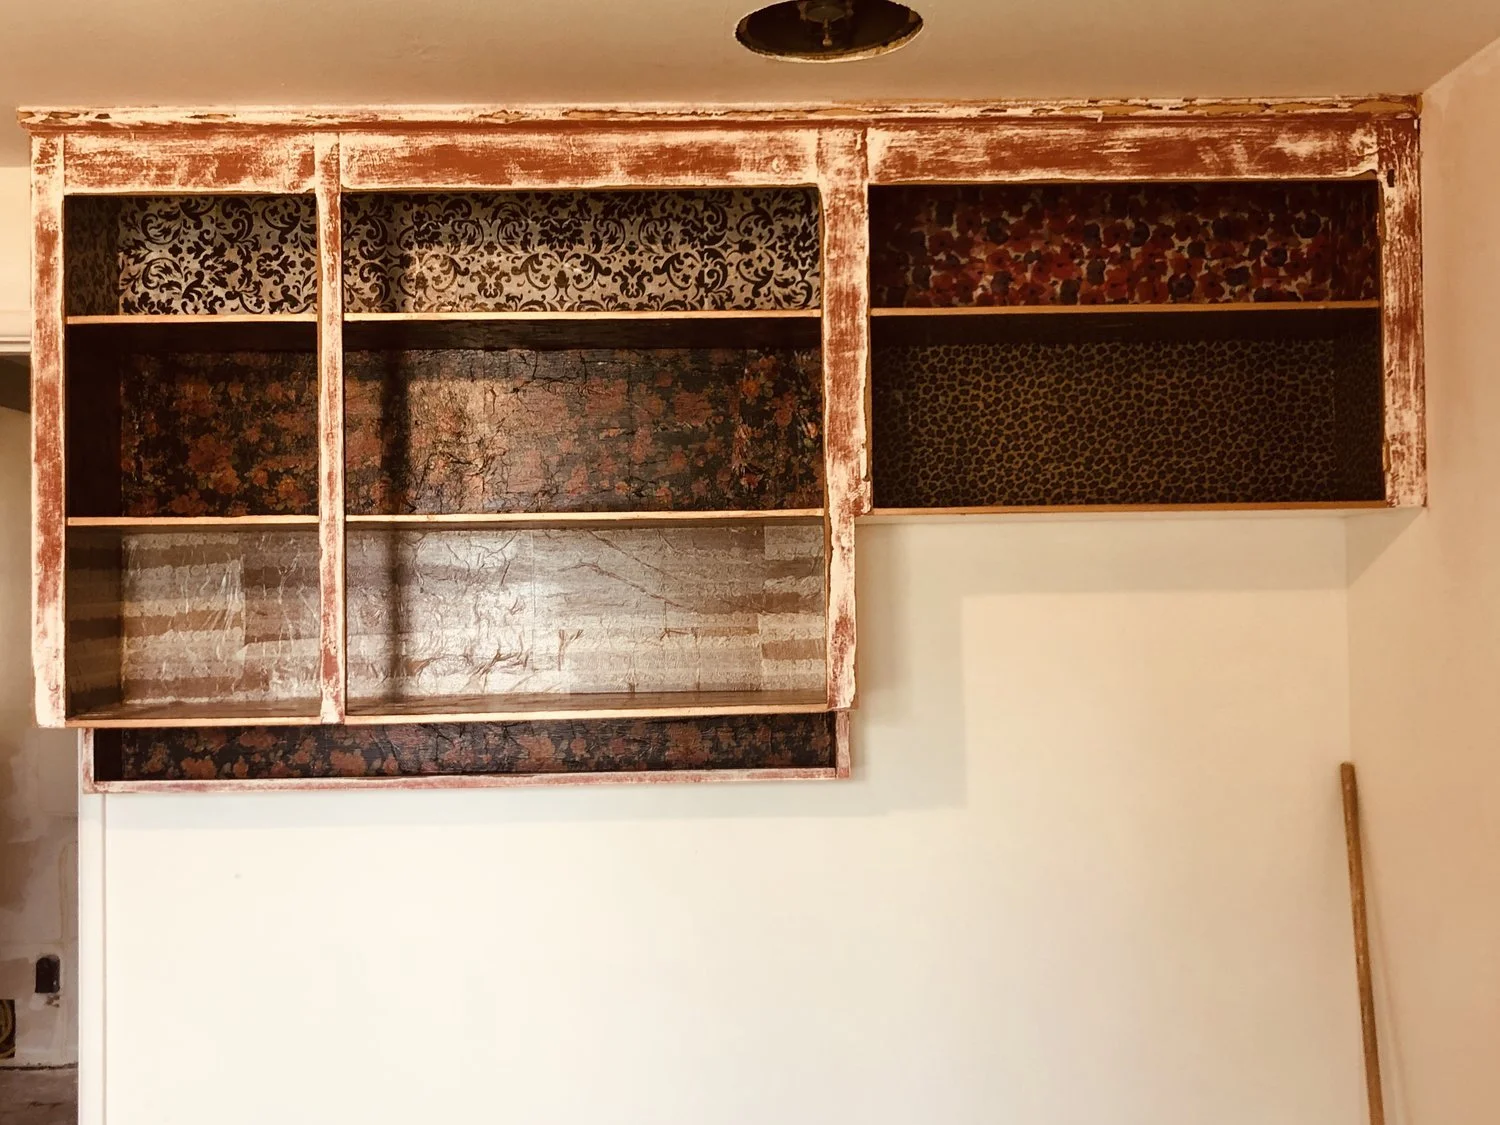
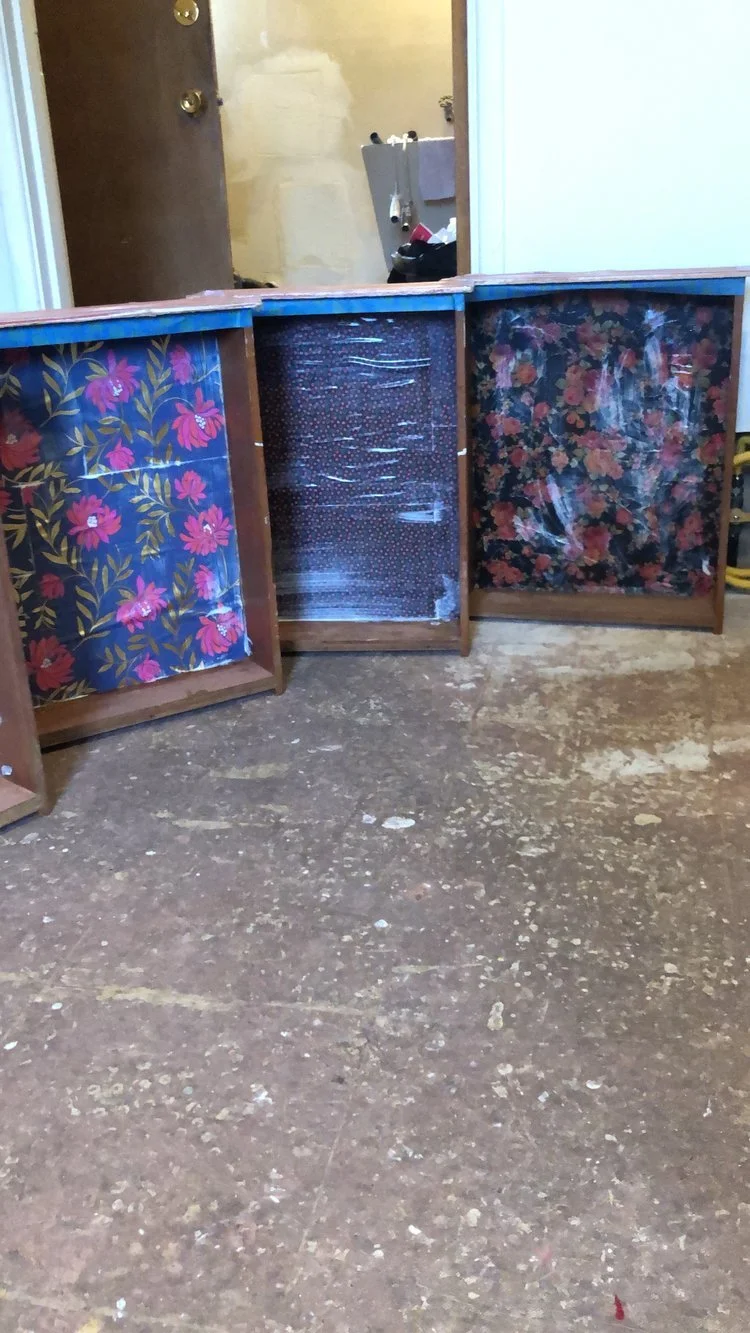
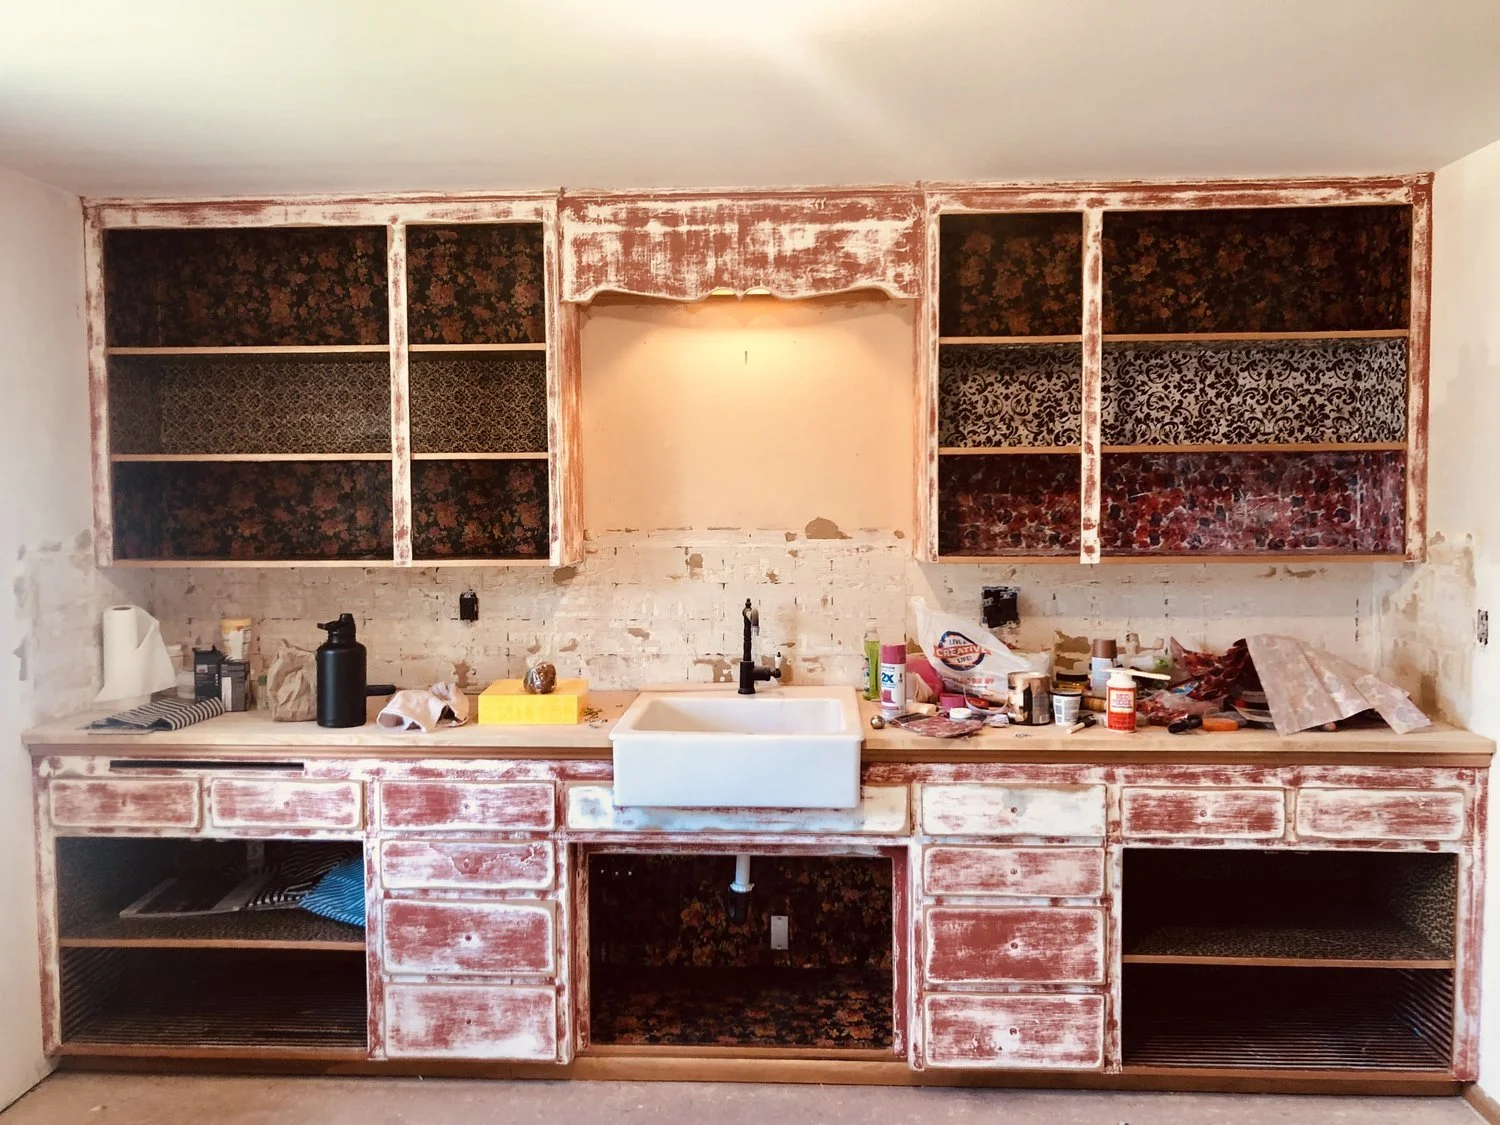
As I mentioned, these cabinets are original to the house. So they’re SUPER old. I needed a fun but easy way to spruce them up, so I learned the art of decoupage. It adds an unexpected pop to all of the cabinets and drawers in the kitchen. Here’s the tutorial I used. I chose tissue paper over napkins since it was such a large space that I was covering.
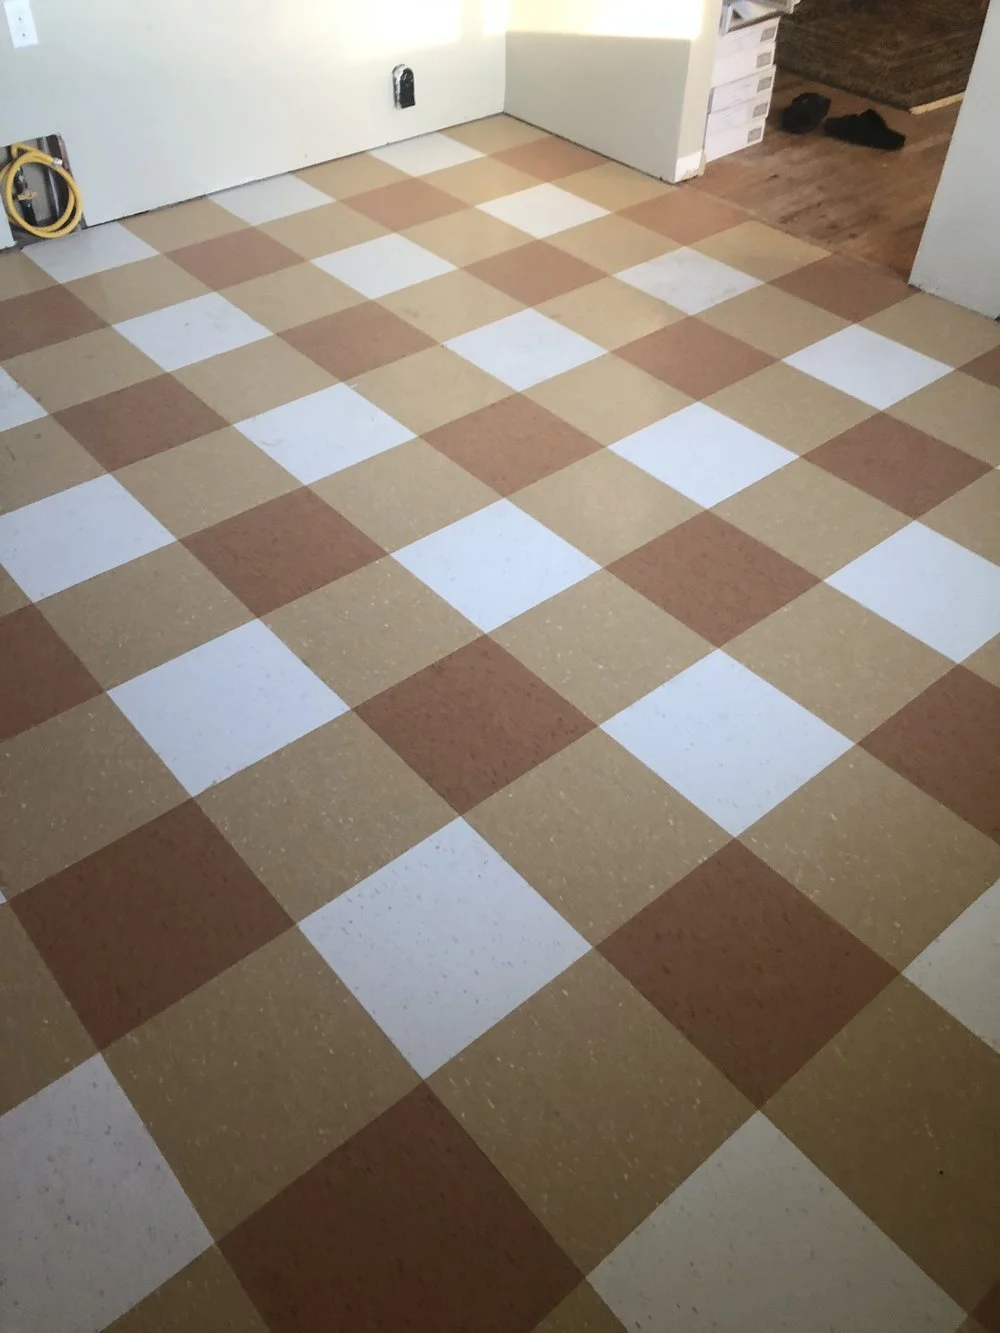
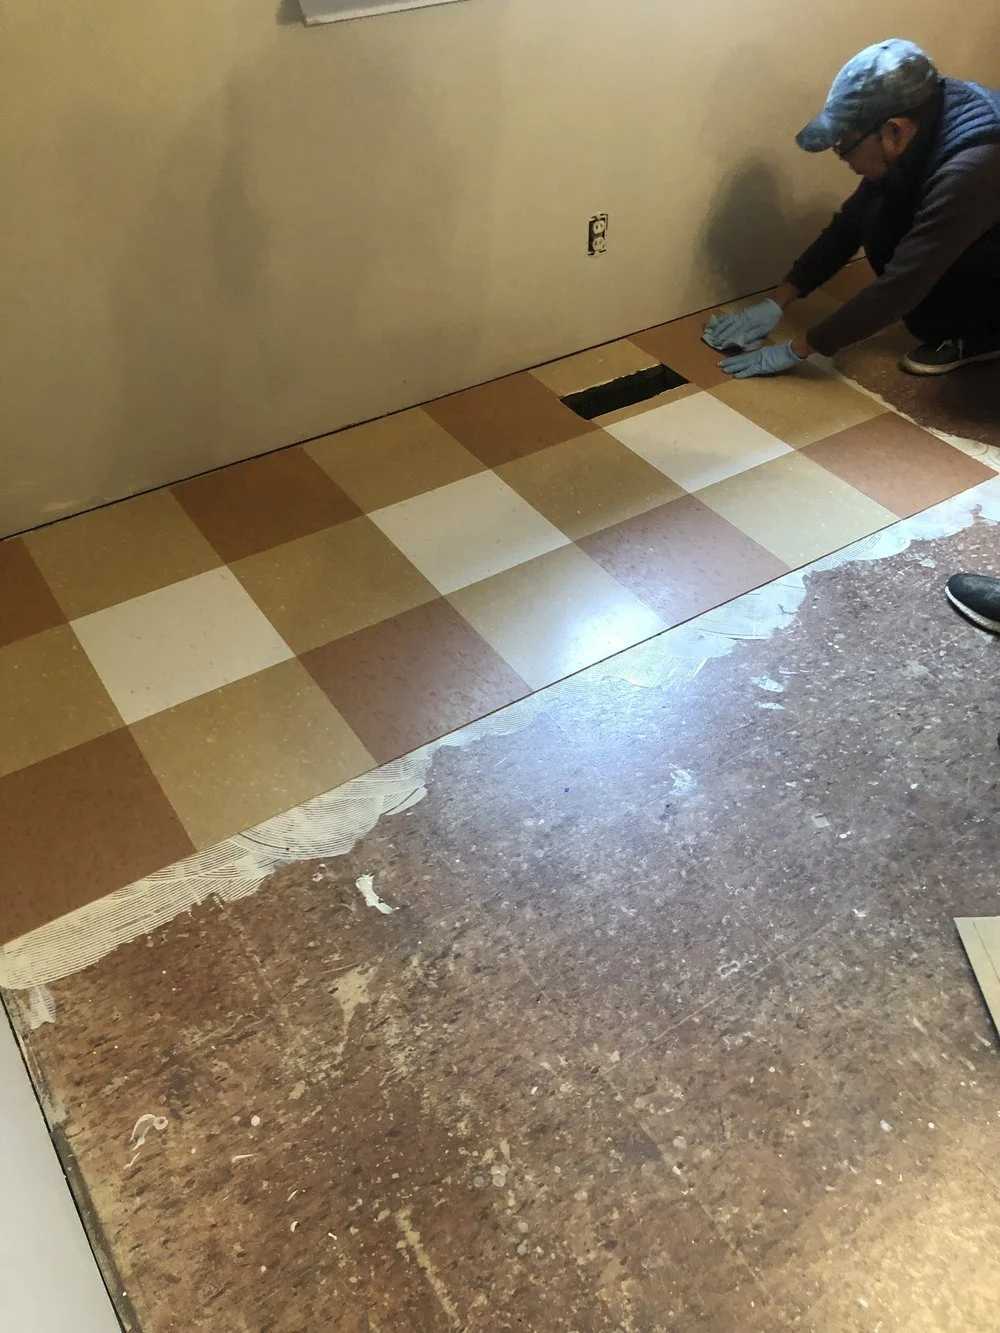
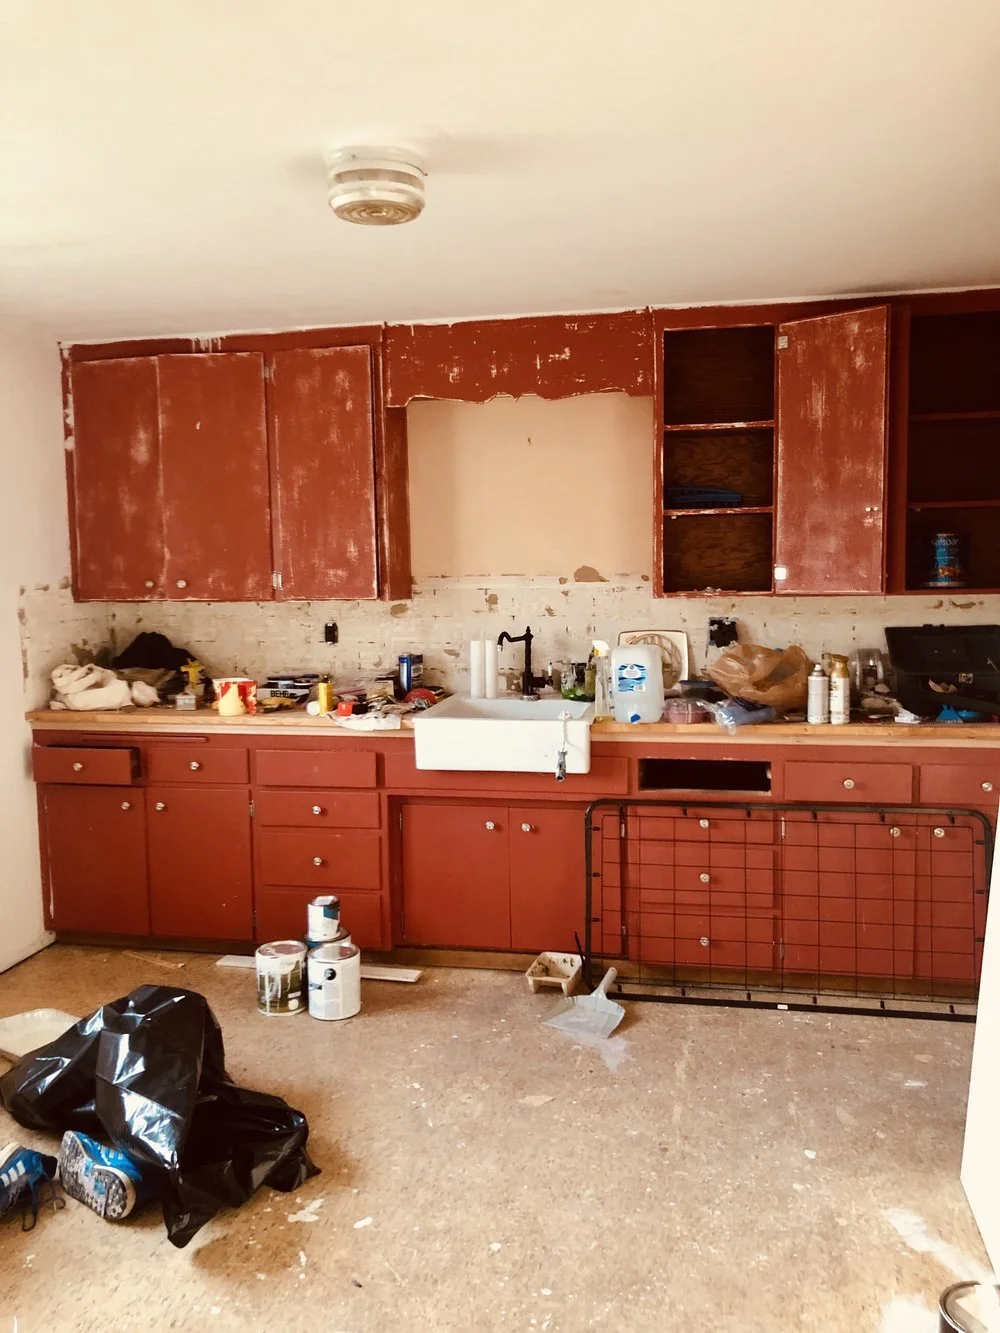
Here’s a little slide show of the work throughout this project. I hope you enjoy! Xx